Managing an employee’s absence
Last updated: September 12, 2025
Entering time off on behalf of an employee
Time & Absence Initiates may enter or correct time off on behalf of campus staff, faculty, academic personnel, and student employees in Workday.
1. Choose the absence entry method that you prefer:
OPTION 1: Actions menu off the employee’s record
From the Actions menu, you can select:
- Actions –> Time and Absence –> Request Absence for a Worker
- Actions –> Time and Absence –> Manage Absence
The Request Absence for a Worker option opens a pop-up calendar over the current Workday page you are on. The Manage Absence option opens the Workday Absence calendar.
OPTION 2: Manage Absence Calendar
From Manage Absence, select the Switch Worker button from the top right-hand side of the calendar to change from one employee record to another. The Switch Worker function opens a pop-up, allowing you to select another employee.
2. To enter the absence, click on one or more calendar days. When selected, the dates will be highlighted.
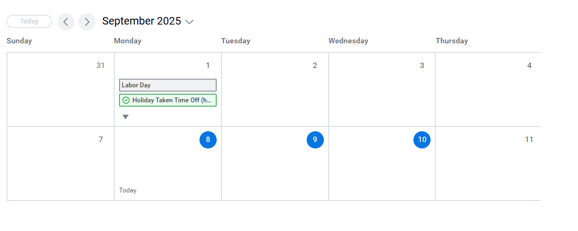
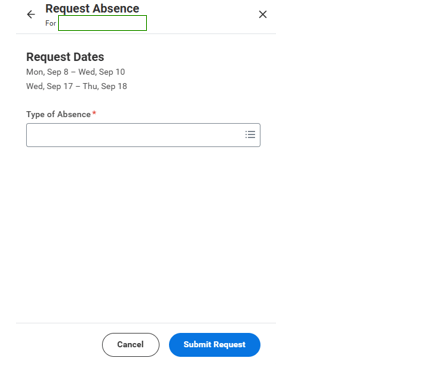
3. At the bottom left, click the button that says # Days – Request Absence. The number displayed in the button will match the number of days you highlighted in the calendar.
4. From the Request Absence pop-up, select the absence type.
5. From the second screen of the pop-up, you may:
- Edit daily hours for each day of the request by changing the value in the Hours (Daily) field
- Change the Position associated with your request (if you hold more than one position)
- Add a Reason code
- Edit Individual Days to change the daily quantity for each selected day
- Add a Comment in the business process that will be appear when the time off is opened in the absence calendar
- Add a Comment to Approver that will appear in the business process history for the Time & Absence Approver
- Expand the Total Request Amount to view the employee’s Available Balance and Remaining Balance after the request
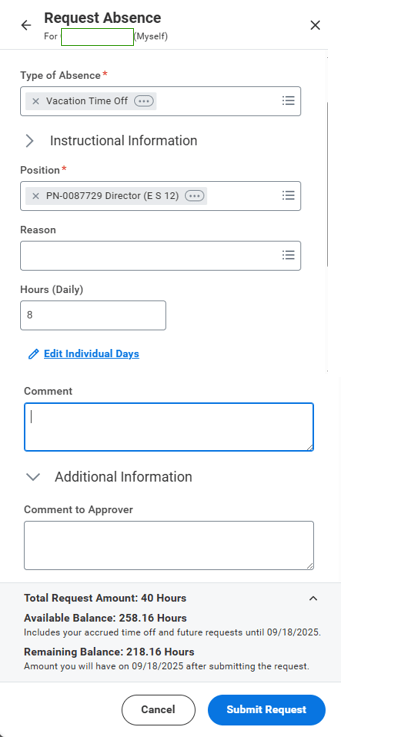
6. Click Submit Request to route the request for review and approval to the Time & Absence Approver, if applicable. Time Off requests must be entered, submitted, and approved prior to the Timesheet Approval Deadline.
Viewing time off balances
From Manage Absence on the employee’s record, you can review Balances on the right-hand side. Change the Balances as of date to view balances as of a future or past date.
Alternatively, from the Actions button above the calendar in Manage Absence, you can select View Absence for Worker, which will open a table of Absence Balances as of Current Date.
Correcting time off
Time Off entries can be corrected in Workday by the employee or the Time & Absence Initiate. Retroactive entries may be changed for up to 90 days from the date of the time off.
To correct a time off, navigate to Manage Absence, select the previously entered time off entry, and click the Edit button. Then change the Type of Absence or Hours (Daily) values, as needed.
Alternatively, from Manage Absence, click Cancel Absence to withdraw the request entirely. The cancellation will route to the designated Time & Absence Approver to review and approve.
Absence types
An important part of managing absence is understanding the various types of Time Off and Leaves of Absence. Review the Time Off Types webpage for more information. Some absences, including those that may qualify for the Family and Medical Leave Act (FMLA), Disability Leave, or Parental Leave require both a Leave of Absence (LOA) request and an accompanying request for Time Off. Review calendar examples for more information.